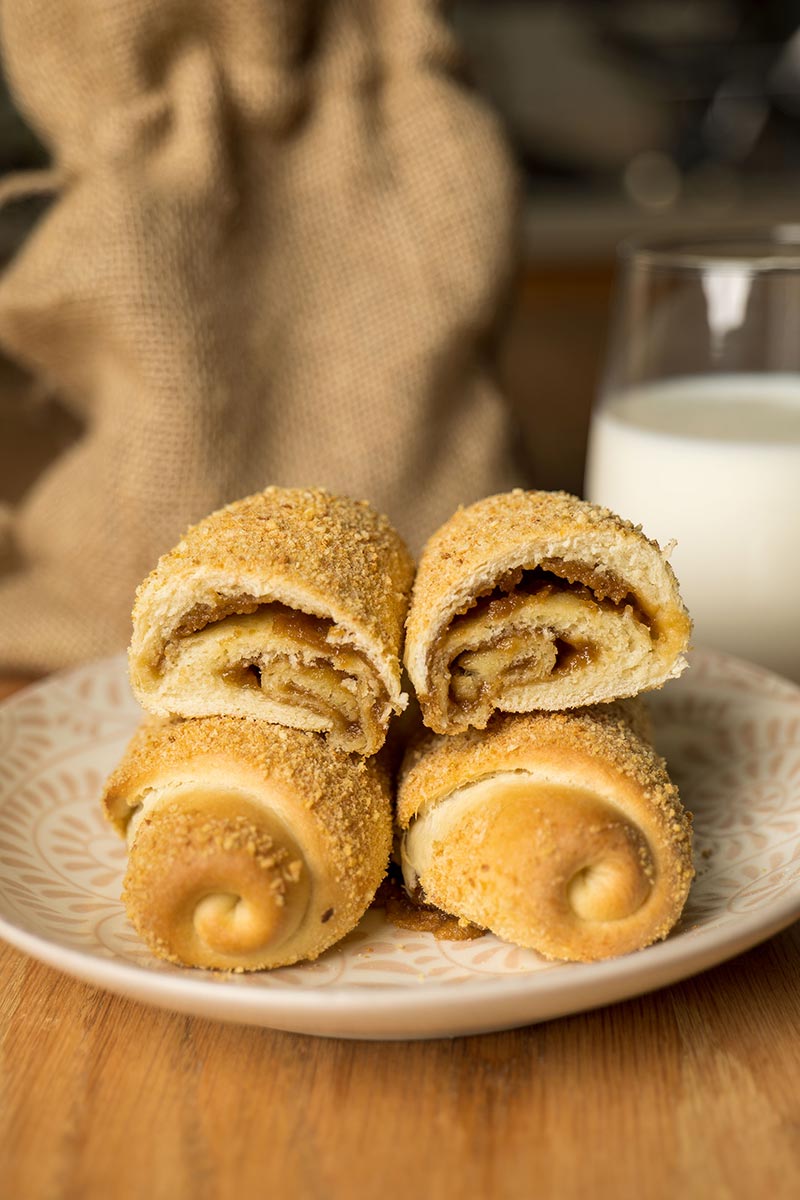
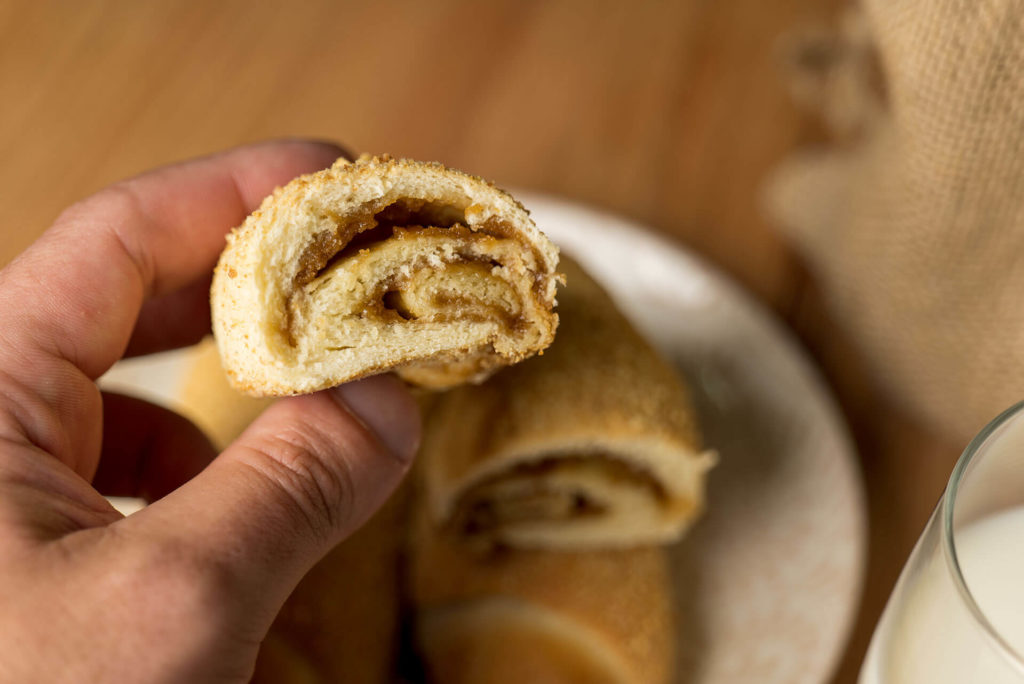
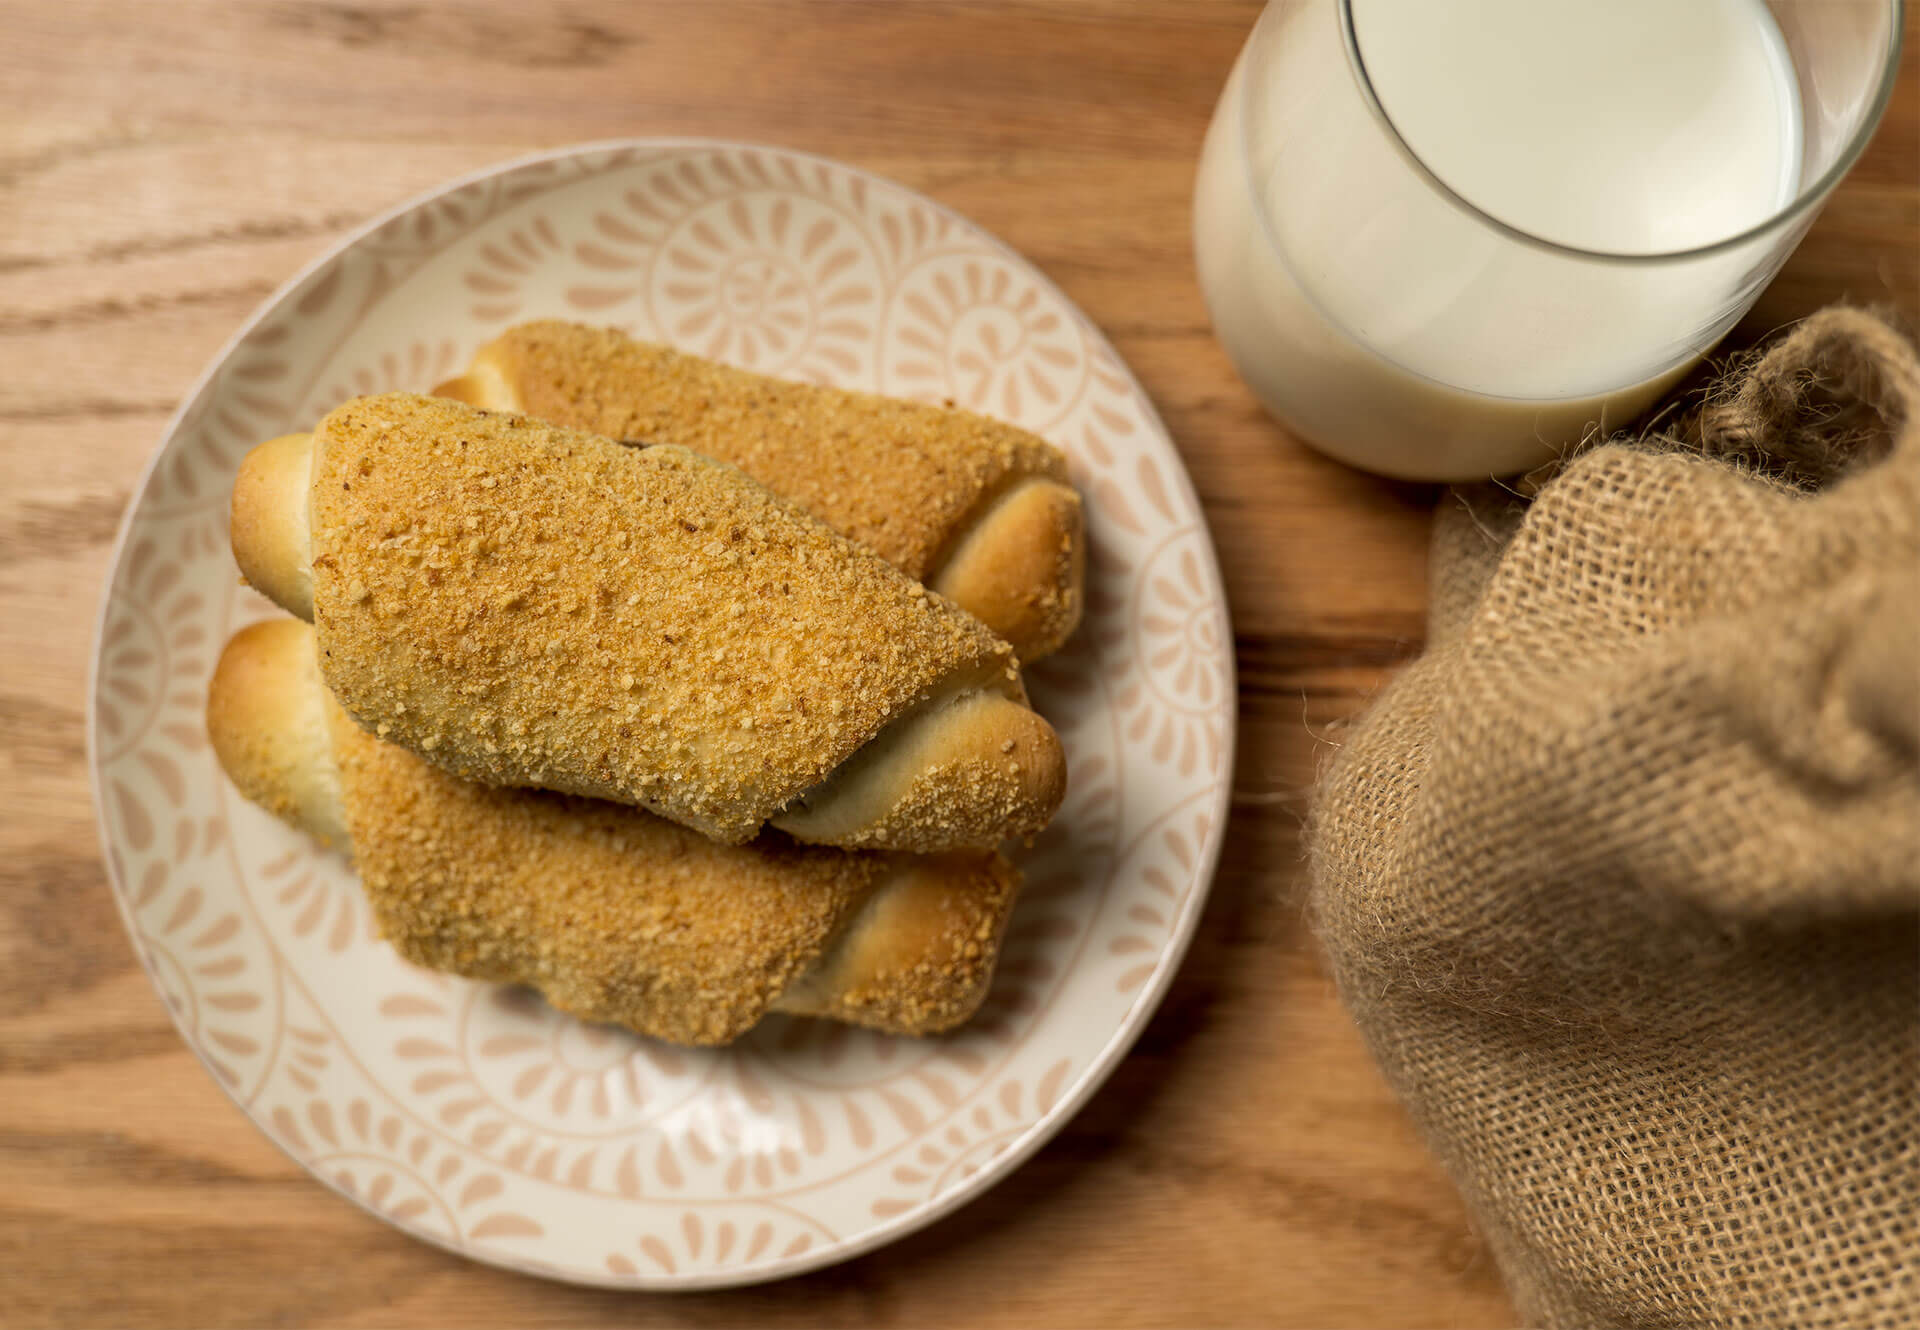
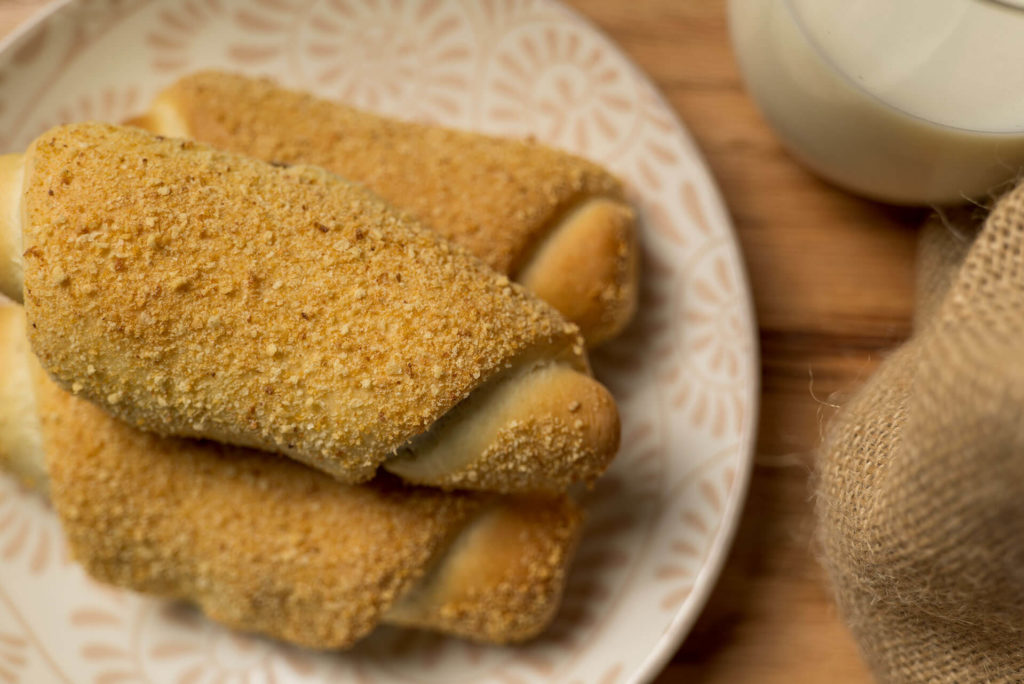
Sweet bread rolls filled with delicious sweet paste baked in crispy breadcrumbs? SIGN ME UP! I first came across this delicious bread roll at a friend’s house. He had just come back from the Philippines and had a little bag with three small rolls covered in breadcrumbs. Cheeky me snuck one out of the bag, and it was love at first bite. A soft roll that is sweet but not too sweet, the paste filling has the flavor and texture of a walnut filling, but there are no nuts in it at all.
The breadcrumbs give it a crunchy, sweet outer layer. It’s just awesome for breakfast or afternoon coffee breaks, although you will take a bite every time you pass by one, so be careful.

What is Senorita Bread?
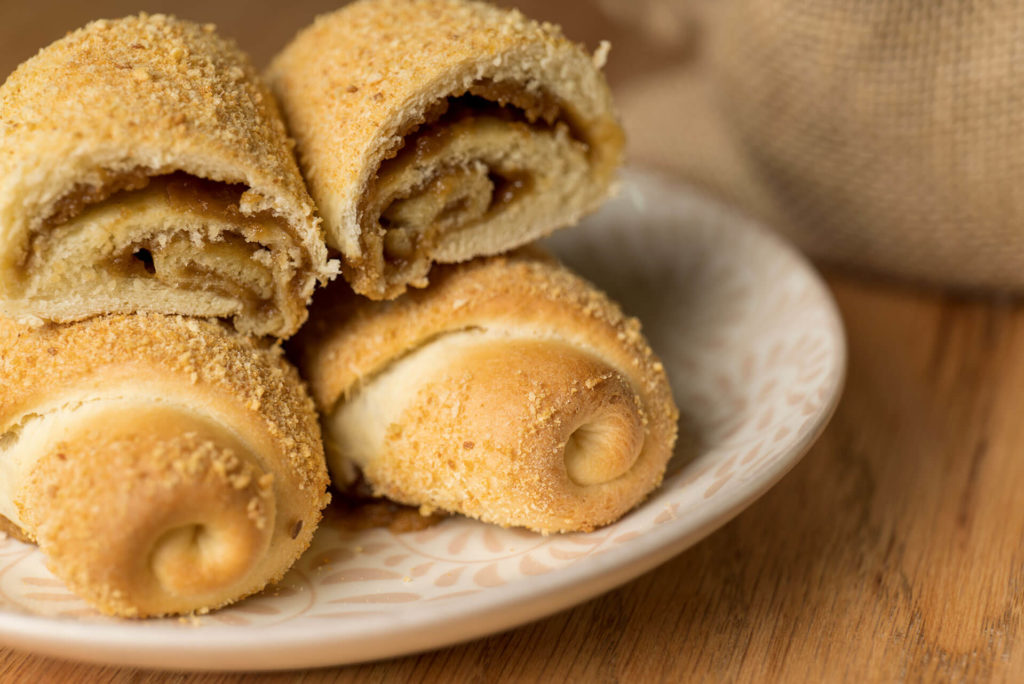
Senorita Bread is a soft, sweet bread roll filled with butter and brown sugar, and baked in crispy breadcrumbs. They are small, soft, and delicious. One Senorita Bread has 246 calories, but you can reduce them if you use a little less sugar and butter.
Ingredients
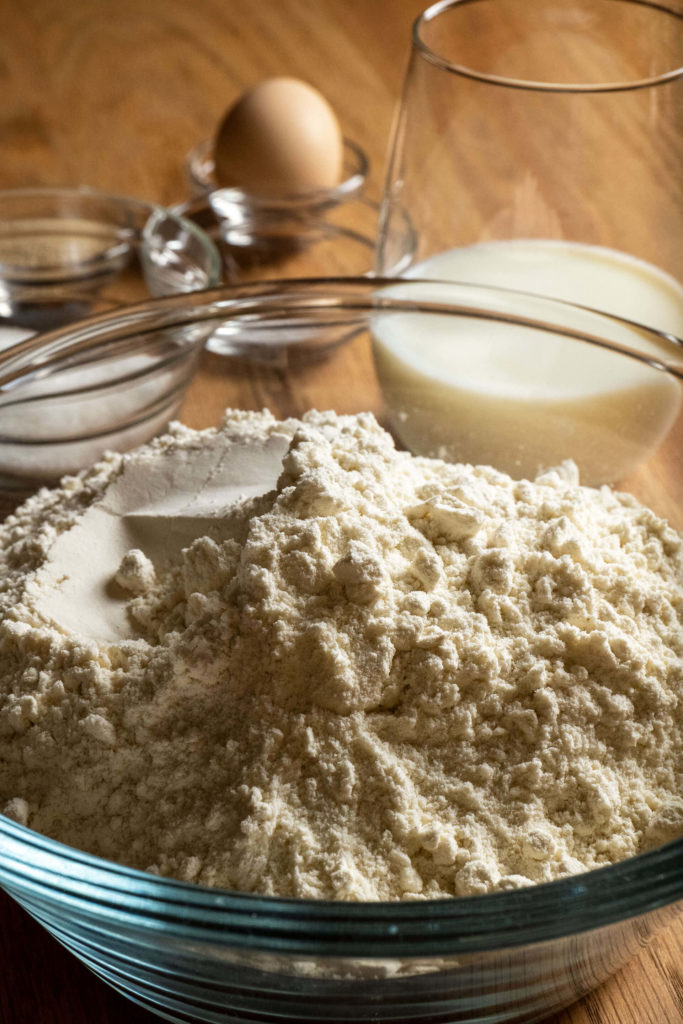
The ingredients for Senorita Bread are very basic and most likely part of your pantry on any given day, which is great if you want to dish something delicious up quickly without running to the store. So here is what you will need:
Bread Dough Ingredients
- 80 Grams of Unsalted Butter (melted)
- 200 Ml of Full Fat Milk ( I have tried this with 2% milk and it worked out fine)
- 1 Sachet of Instant Yeast (if you use active yeast make sure you bloom it first)
- 4 Tablespoons of Crystal Sugar
- 1/2 Teaspoon of Salt
- 1 Large Egg (at room temperature)
- 400 Grams of All Purpose Flour
- 1/2 Cup of Breadcrumbs
- 2 Tablespoons of Vegetable Oil
Senorita Bread Filling Ingredients
- 150 Grams of Light Brown Sugar
- 80 Grams of Softened Butter
- 100 Grams of Flour
How to make Senorita Bread
Making Senorita Bread is easy, don’t be afraid of baking with yeast. Today’s dry yeast is very forgiving, and unless you live in extreme weather conditions, it’s relatively fail-safe. That being said, always check what type of yeast you are using. Even dry yeast has different types. Active Dry yeast, for example, requires blooming before baking, while Instant Dry Yeast is ready right away.
But without getting into all the science and nitty-gritty details of bread baking, let’s see how this recipe is made.
The Recipe
Señorita Bread Recipe


Ingredients
Dough
- 80 Gram Unsalted Butter Melted
- 200 Ml Full Fat Milk
- 1 Sachet Dry Yeast
- 4 Tbsp Crystal Sugar
- 1/2 Tsp Salt
- 1 Large Egg
- 400 Gram All-purpose flour
Filling
- 100 Gram All Purpose Flour
- 150 Gram Light Brown Sugar
- 80 Gram Unsalted Butter
Instructions
Spanish Bread Roll
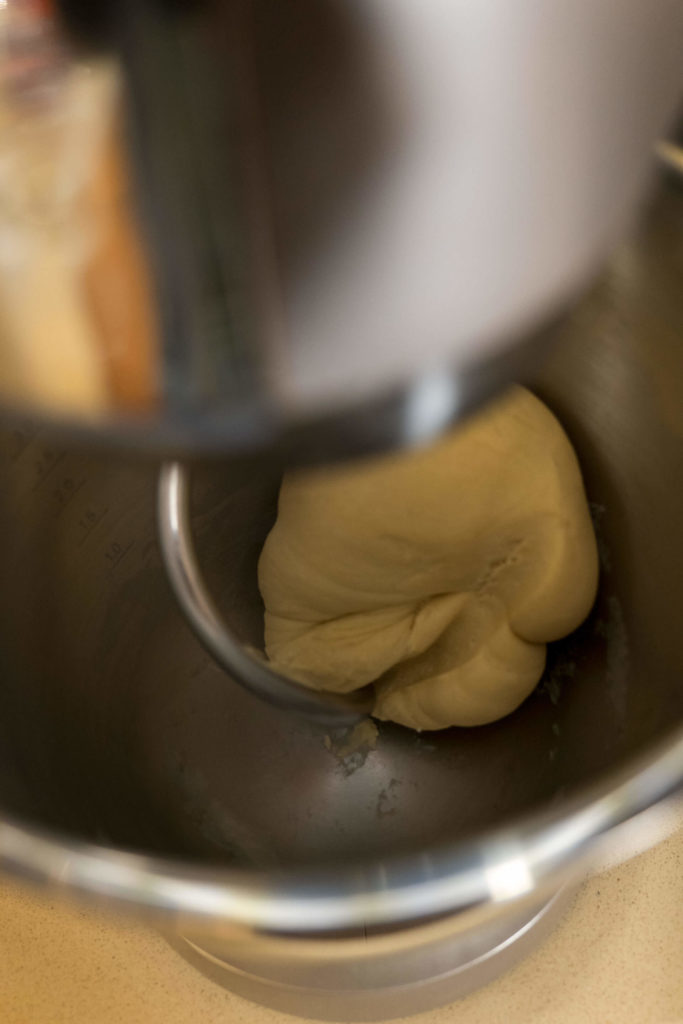
- Combine the melted butter with the milk, Instant Yeast, sugar, salt, and egg in a large mixing bowl. Stir a little and add in the flour. Knead the dough at medium speed for 7 minutes.80 Gram Unsalted Butter, 200 Ml Full Fat Milk, 1 Sachet Dry Yeast, 4 Tbsp Crystal Sugar, 1/2 Tsp Salt, 1 Large Egg, 400 Gram All-purpose flour
![]()
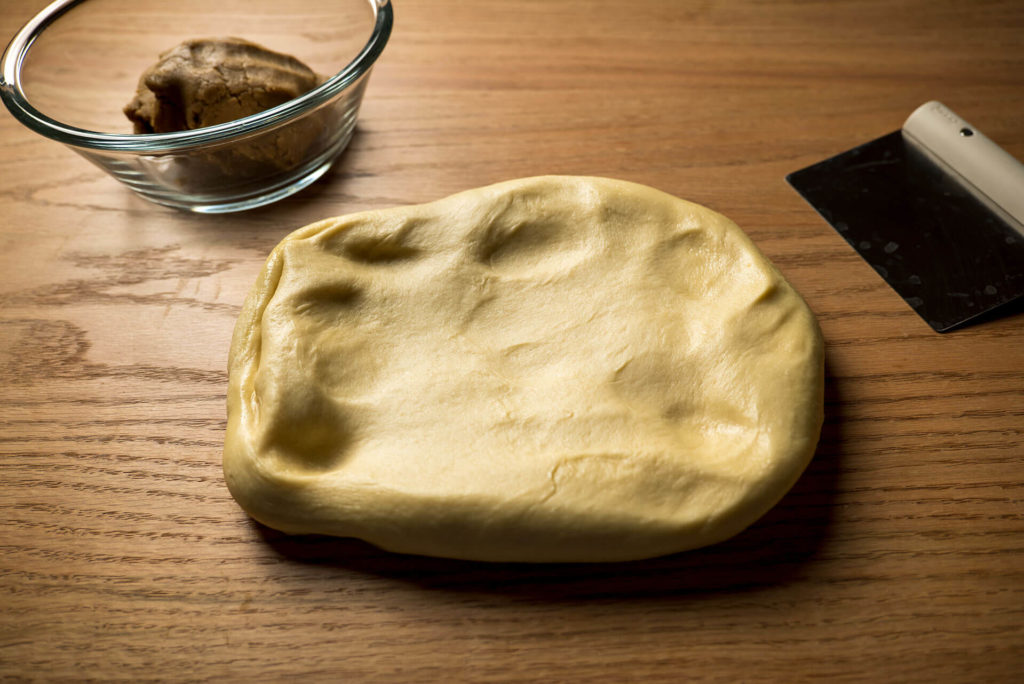
- In a clean, large bowl, add 2 tablespoons of vegetable oil. Fold the dough into a ball and place it into the oiled bowl. Cover with cling film and let the dough proof for one hour.
![]()
Spanish Bread Filling
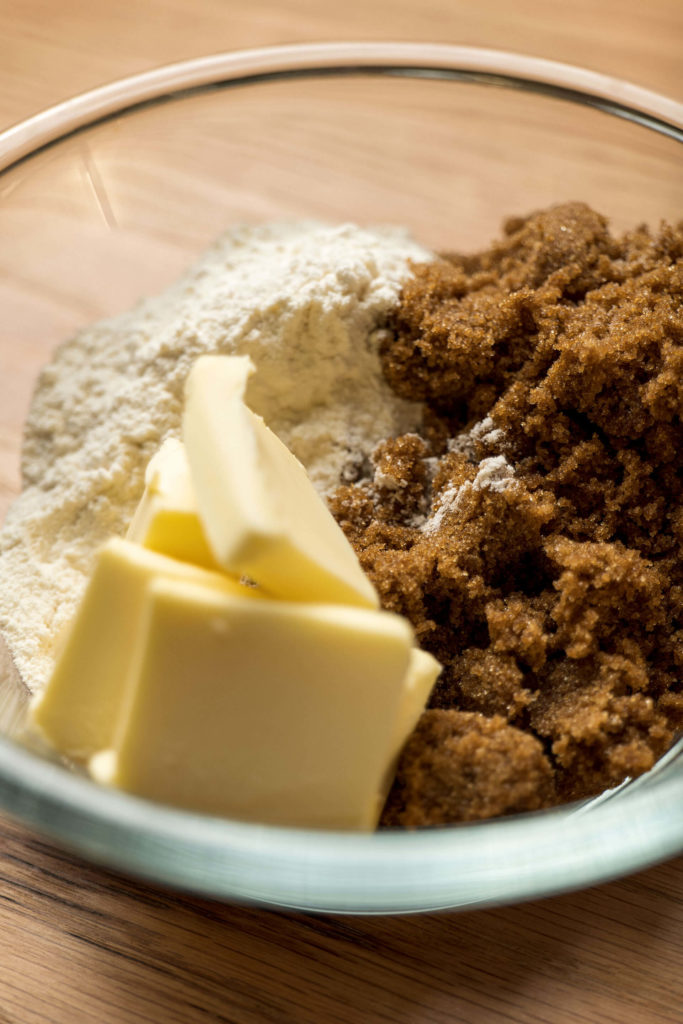
- Combine the Flour, Light Brown sugar and softened butter and cream with a hand mixer.150 Gram Light Brown Sugar, 80 Gram Unsalted Butter, 100 Gram All Purpose Flour
![]()
Shape Senorita Bread
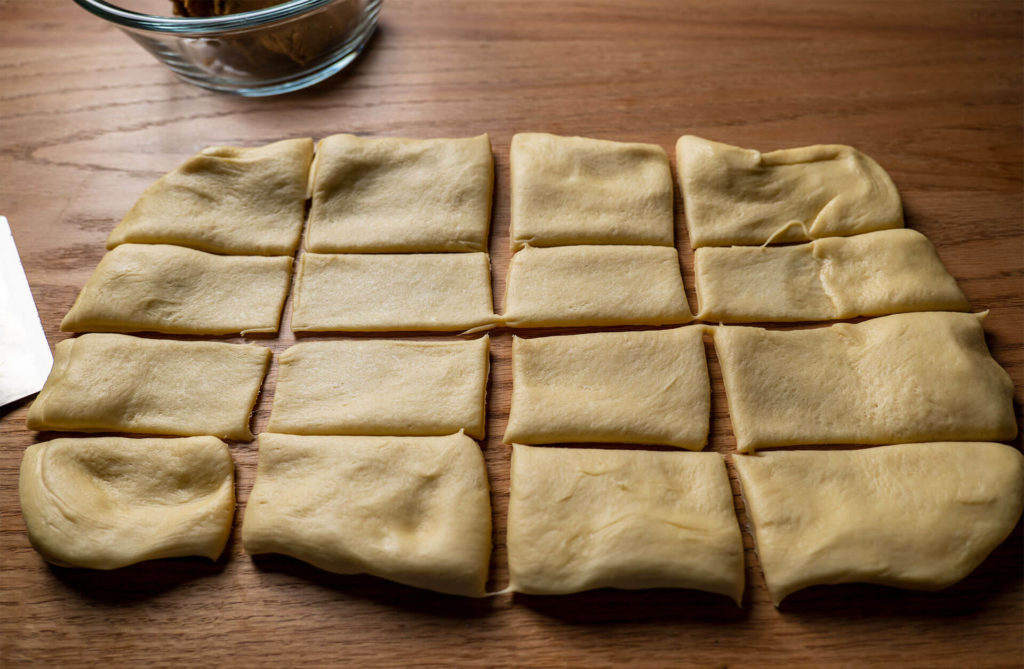
- Place the dough on your working surface. You won't need to flour the surface as the dough is oily and not too sticky. Pull into a rectangle that's around 14 x 8 inches in size. Using a knife or bench scraper, cut into 16 equal pieces.
![]()
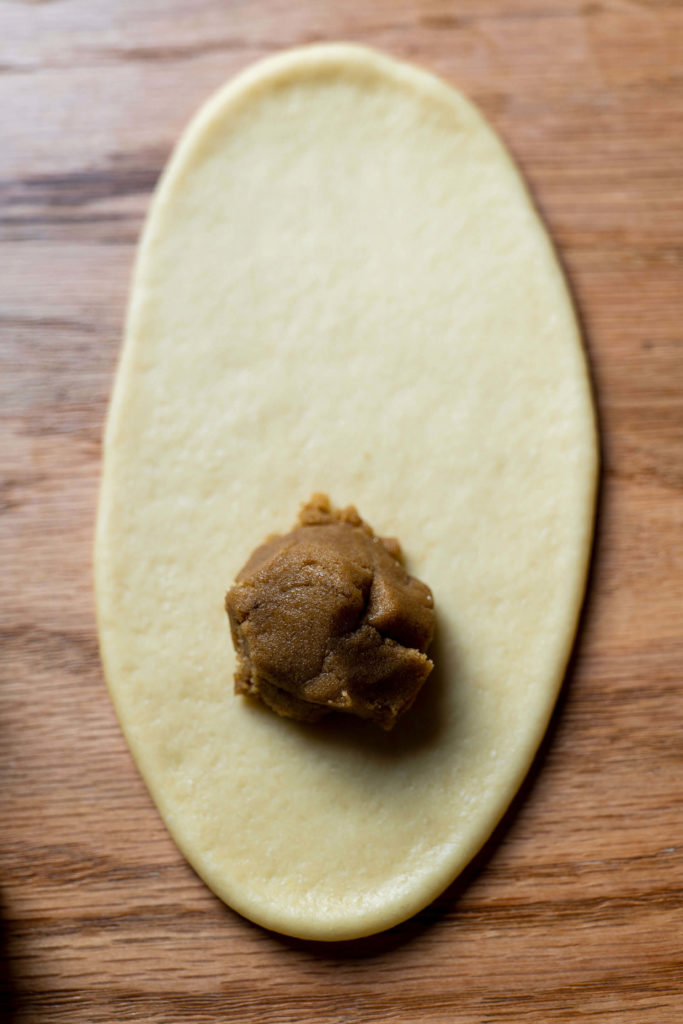
- Using a fold-over technique, fold the dough into a round ball and place it on a piece of baking paper. Now place one rolled dough ball on your working surface. Using the palm of your hand, press the dough ball into a long shape that's around 2-3 inches wide and 7 inches long.
![]()
- Add one teaspoon of filling on the rolled-out dough and press it out, leaving some space on the sides, top, and bottom.
![]()
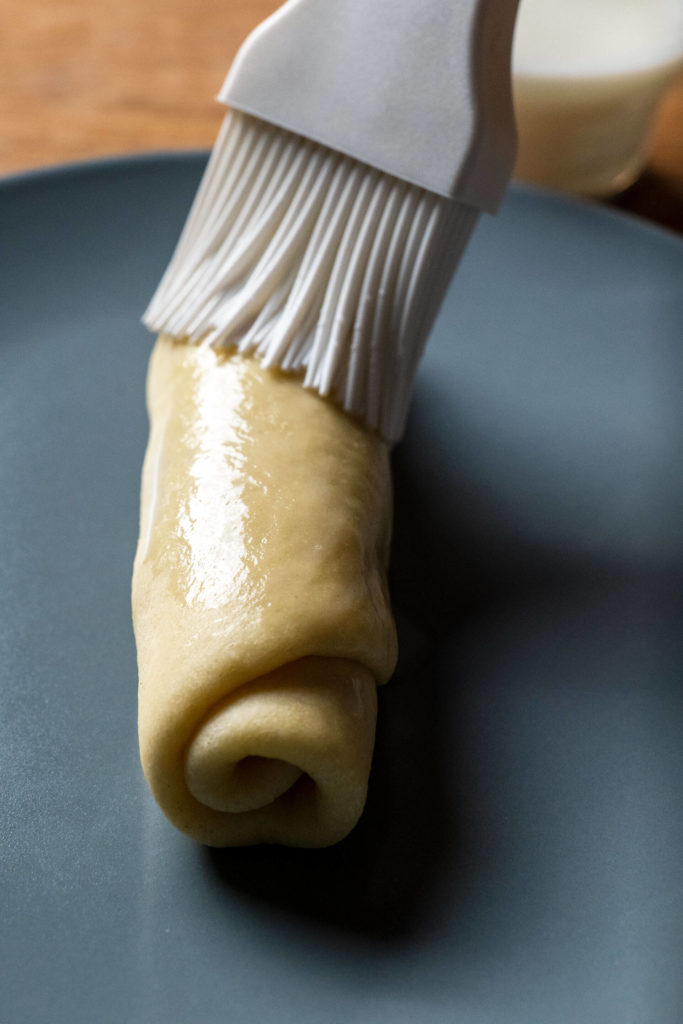
- Tightly roll the dough into a sausage, going little by little and rolling it tightly without stretching the dough out. Pinch the edge well together so it doesn't open up during baking. Place it with the seam facing down on the baking paper.
![]()
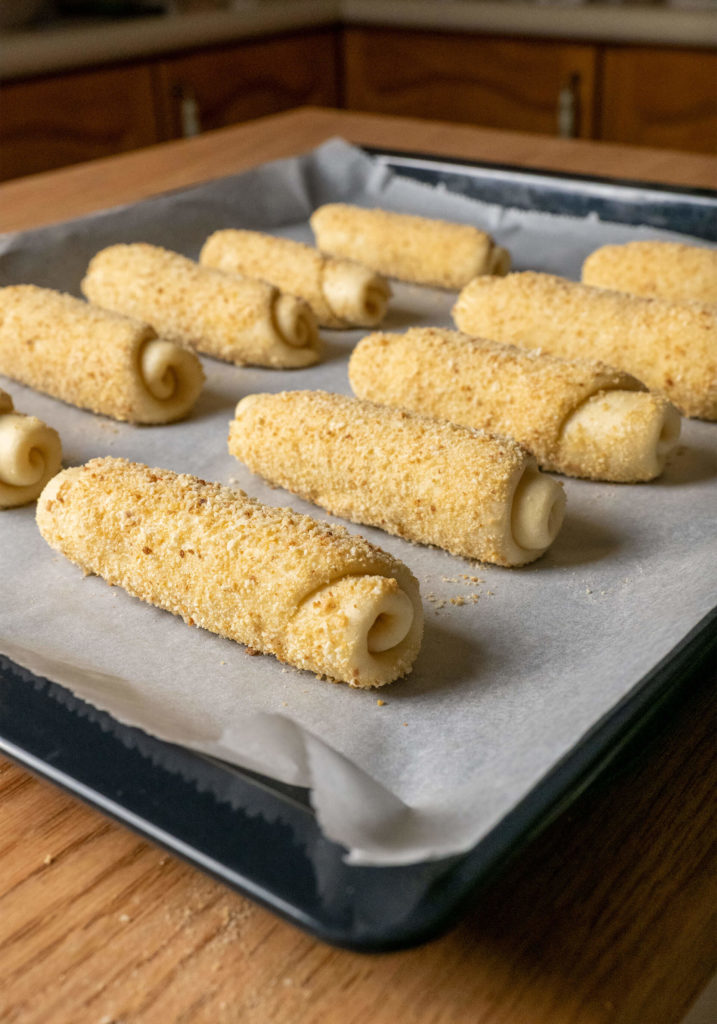
Crumb and Bake
- Prepare a dish with the breadcrumbs, Brush the rolls with a little bit of milk,
![]()
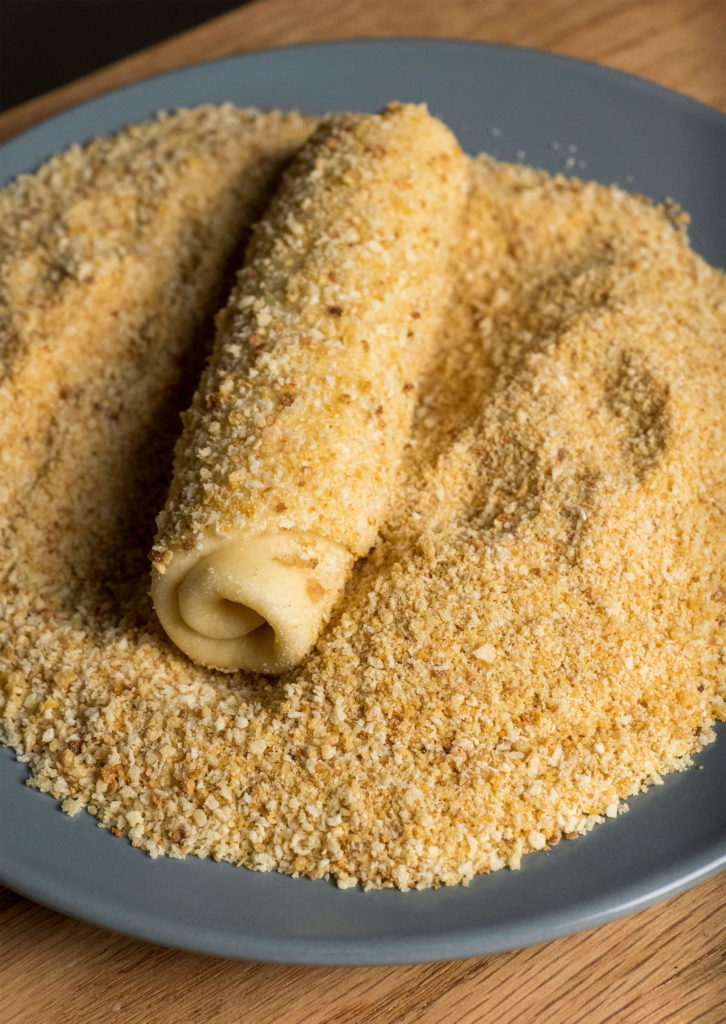
- Now roll the Spanish roll in the breadcrumbs and place on a baking tray lined with baking paper
![]()
- Bake at 175C or 345F for 12 to 15 minutes. Let them cool on a cooling rack and enjoy.
![]()
Video
Notes
- Watch the baking time. Every oven is different, so it might take a bit more or less time to bake Senorita Bread. The color is always a good indication; aim for golden brown.
- Instant Yeast vs Active Dry Yeast: Instant yeast can be mixed in without any blooming, but if you are using Active Dry Yeast, then mix it with the milk and sugar and let it rest for 12 minutes. If the mixture forms bubbles on the surface, the yeast is ready. If it doesn’t, your yeast might be dead, so use a different batch.
- You don’t NEED a stand mixer for this recipe; hand kneading will work perfectly well. Just take your time and keep kneading and folding. 7 minutes of stand mixer kneading equals about 20-25 minutes of hand kneading.
- Let your rolls rest for 10-15 minutes before baking to avoid cracking or leaking.
Nutrition
Why is it called Señorita Bread?
In 1521 Ferdinand Magellan came to the Philippines, this marked the begin of the Spanish colonial period on the island which lasted until the Philippine Revolution of 1898. Needless to say, 377 Years of colonisation has an impact on culture and cuisine. While many Filipino dishes seem to be of Spanish origin, the Filipino people adapted those recipes and made them their own resulting in delicious versions of dishes such as Lechón, Chicharrón and Arroz a la Valenciana.
Why is Señorita Bread called Señorita bread or Spanish bread? Well I have done a LOT of searching without any concrete evidence of why its called that way. I have reached out to some friends in the Philippines so as soon as they get back to me I will update this article. My theory is that some clever Filipino baker adapted and improved a Spanish bread recipe and filled it with delicious sweet paste giving us the Spanish Bread we know today.
How to store Señorita bread!
Spanish Bread stays fresh for 2-3 days without refrigeration. Just make sure you keep the rolls covered to avoid them drying out. You can keep the bread rolls in the fridge which will keep them fresh for a couple of more days, however they will be a bit harder. You can soften them up by zapping them in the microwave for 10-12 seconds.
Can you freeze the rolls?
Yes, you can freeze this recipe. Put them in Ziploc or freezer bags and place in the freezer. To thaw simply leave them out for 20-30 minutes or place them in the microwave and zap them in 15 second bursts until soft.
Bake the next day
If you want to bake the rolls the next day, then you can refrigerate them after you have prepared the rolls. Place them on a tray lined with baking paper and cover with cling film. Leave some distance between them as they will still rise a little in the fridge. Yeast fermentation is slowed in the fridge so it shouldn’t rise too much.
Tips & Tricks
Here are some tips & tricks for this recipe:
- Yeast vs Yeast?
- Not all yeast is the same, there are a few different types but the ones you will run in at the supermarket are most likely: Instant Yeast, Active Yeast and Fresh Yeast. Each type requires a slightly different approach when baking. If you are looking for the easiest and safest type then go with Instant Yeast, it works without any additional steps, just chuck it in to the recipe and you are good to go. Active Yeast and Fresh Yeast both require blooming. Dissolve in some of the milk from the recipe and let it rest for 10 minutes until it bubbles up.
- Avoid bursting rolls
- When I first made this recipe, the rolls burst open and leaked the delicious paste. It was easy to just cut of the leaked part (and eat it) but I would have preferred more filling instead of a popped roll. To avoid this happening to you, make sure you don’t roll the dough out too thin. Also, when you apply the paste to the dough, go easy as it thins out the dough and might tear it. Last but not least, let the rolls proof before baking them. The better they rise before baking the less chance of a tear in the pastry.
- Different types of filling
- If you want to go with an authentic recipe, then skip this tip. But if you are like me, constantly experimenting with recipes then hear me out. I tried fusing this recipe with Hungarian and Austrian dessert cuisine and the result was AMAZING.
- For the Hungarian version, I made a walnut paste by boiling 1/2 cup of finely chopped walnuts, 1 cup of sugar and 1/8th cup of Butter in 1/2 cup of milk. Cool and let it set. Voila.
- For the Austrian version, I made a poppy seed paste by boiling 1/2 cup of dried poppy seeds in 1 1/2 a litre of milk with 1 cup of sugar and a teaspoon of vanilla extract.
- If you want to go with an authentic recipe, then skip this tip. But if you are like me, constantly experimenting with recipes then hear me out. I tried fusing this recipe with Hungarian and Austrian dessert cuisine and the result was AMAZING.
- Margarine or Butter?
- The traditional Spanish Bread recipe is made with Butter in the dough and margarine in the filling. I’m more of a butter kinda guy so I went with butter, but Margarine will probably make it easier to spread. I need to test it with both, but let me know what you think in the comments.
Hey wait…
If you have any questions, ideas or feedback, I would love to hear from you. Leave a comment or contact me and ill get back to you as soon as possible.
Thanks you
Roman