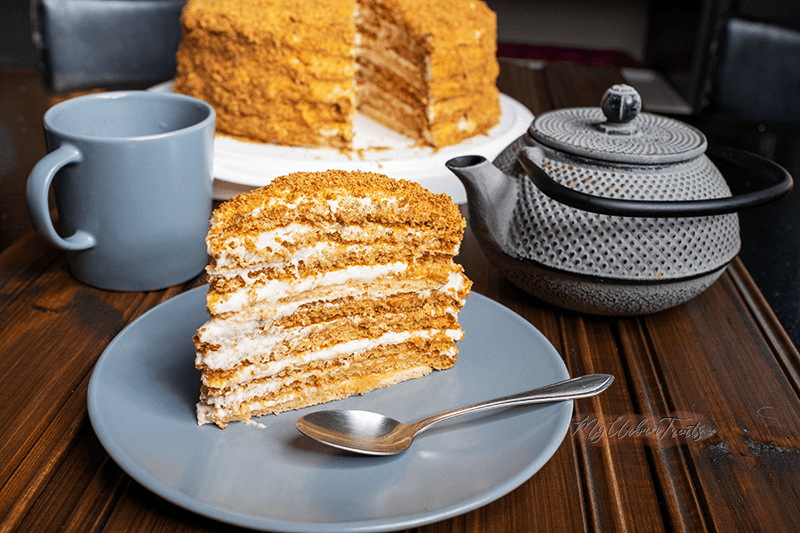
I first saw this cake while visiting a client in St Petersburg. I was intrigued by the look and many layers of Medovik Honey Cake and just had to try it. The result was just instant love for this dessert.
Every bit is packed with burnt honey flavour and the cream filling. It’s just a piece of heaven in each bit. When I returned home I had to find a recipe that is as close as possible to the original, after two weeks of testing recipes a friend told me that his Ukrainian grandma made a very similar cake. So we met and talked a lot about baking and she shared some tips and tricks with me that resulted in this amazing Medovik Honey Cake recipe.
Medovik Baking Tips
While baking Medovik is not necessarily difficult, it does have a lot of steps and takes quite some time so make sure you have at least 4 hours for this cake. Here are some more tip’s and tricks to help you bake this delicious Russian cake.
- Mix the cream in two batches
- This one is quite important as you will need a LOT of heavy cream for the layers. I mixed this in two batches and then combined it in a larger bowl. Give it another good stir to make sure you have an even flavour.
- Don’t over burn the honey
- While its a “burned” flavoured cake you really don’t want to over-burn it. As soon as the honey starts smoking get it off the heat. This way you will get the perfect balance of flavour.
- Use a coloured pencil to mark the baking paper
- When creating the layers you will need to draw circles on the backside of the baking paper to get an even shape. Its not easy to write on baking paper but coloured pencils and pastel pencils work really well for this.
How long does it take?
Baking Medovik is not a quick job by any means, it takes a lot of preparation, baking, assembling, cooling and so forth. So how long do you need to make a Medovik cake? If its your first time, probably around 4-5 Hours. Yes you read that right. While you can get faster with practice, even me after 5 years of baking this cake, still need 3 to 3 1/2 hours for it. No way around it I’m afraid, but if you love baking or bake with someone you love, then time fly’s. And lets not forget, its all worth it when you see the look on your friends and families eyes after every bite.
Ingredients for Medovik
Medovik is a made out of layers of honey cake and honey cream so you will need a LOT of heavy cream for this recipe. You will also need a cup and a bit of soft caramel, Dulce de Leche works best for this. If you haven’t made Dulce de Leche before, make sure you check out my recipe. Its super easy and just tasty.

Here is a full list of ingredients to make this delicious treat.
- 1 ½ cup Honey, If you can get your hands on Wildflower honey than go for that, it really gives it a nice extra touch of flavour. If not, any type of honey will work.
- 1 ½ cup All-purpose flour
- ½ cup Water
- 7/8 cup Butter
- 6 Large Eggs
- 2 ½ tsp Baking Soda
- 2 ½ tsp Salt
- 1 tsp Cinnamon
- 1 ¼ cups Dulce de Leche ( click the link for my recipe)
- 4 ¾ cups Heavy Cream
Medovik is not difficult to make but it does take a lot of time, make sure you reserve your a few hours but trust me.. its worth every minute spent 🙂
The origin of Honey Cake
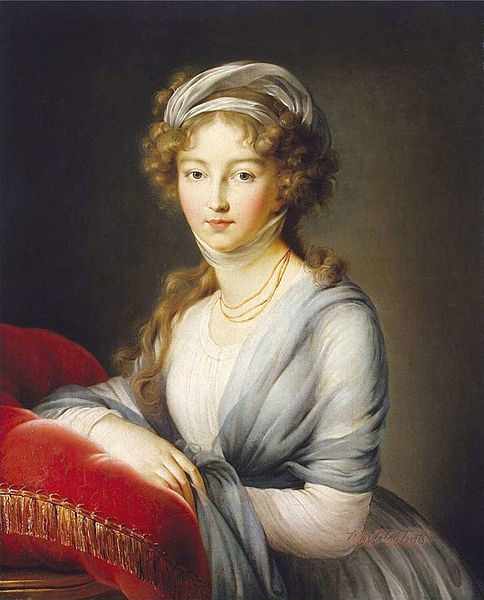
Medovik cake has quite an interesting story behind it. The cake was invented by a young chef in the 19th century who wanted to impress the Russian Empress Elizabeth Alexeievna. It was well known that the empress disliked honey, so what better challenge than baking a Honey Cake that she actually loved?
Without revealing the ingredients, the chef let the Empress taste his creation and she fell in love with the cake. When the chef revealed the contents of the cake she had him beheaded for tricking her. No, she didn’t I’m just kidding 😀 she fell in love with the cake and they lived happily ever after.
Other Desserts by My Urban Treats
If you are looking for some more dessert recipes, check out my dessert collection or maybe one of my favourites such as:
- Fluffy Vanilla Cake
- Nussecken (german nut corners)
- Hazelnut Slices
If you have any questions about my recipes, make sure you post them in the comments for all to benefit. I try to get back to each comment within 24hrs. Thanks
Medovik Russian Honey Cake
Ingredients
- 1 ½ cup Honey
- 1 ½ cup All-purpose flour
- ½ cup Water
- 7/8 cup Butter
- 6 Large Egg
- 2 ½ tsp Baking Soda
- 2 ½ tsp Salt
- 1 tsp Cinnamon
- 1 ¼ cups Dulce de Leche
- 4 ¾ cups Heavy Cream
Instructions
- Prepare 12 sheets of baking paper cut to the size of your baking tray. Note that you can reuse the sheets, in this case you can cut double the amount of sheets you will bake at the same time so you can prepare another batch while the first one is in the oven. Using the bottom of a 9 inch spring form, trace a circle on each baking sheet. Colour pencils seems to work best on parchment paper. Make sure that the cake is placed on the opposite side of the drawing as you don't want the chemicals of the pencil touching your cake batter.
- In a small saucepan, add 3/4 of a cup of honey and bring to simmer over a high heat then lower the temperature to simmering point. Occasionally stir with a wooden spoon to avoid burning, it will start foaming don't worry this is normal. Keep cooking and stirring until the honey starts to smoke, be careful as it can burn very quickly. As soon as the honey starts smoking take it of the heat and slowly stir in the 1/4 cup of water. It will bubble profusely, stir and let it settle. Set aside.
- Fill a small to medium sized sauce pan with 3 to 4 centimetres of water and set over medium heat. You will need a heat proof bowl that fits in the bermari. Bring the water to simmer and in the heat proof bowl combine 1/4 cup of burned honey, 3/4 cup of honey, the sugar and butter and place in the bermari.
- In a separate bowl prepare your eggs and set aside, mix the baking soda, salt and cinnamon and also set aside. Once the butter has melted whisk to combine, test with your finger when the mixture is warm (not hot or boiling). Now whisk in the eggs, this will cool down the mixture, keep stirring until you are back at the warm temperature. Add the previously prepared soda, salt and cinnamon and keep whisking. The batter will foam lightly, this means its ready. Set aside and allow to cool for 20-30 minutes.
- Add the warm egg/honey mixture to a large bowl. Sieve the flour gradually in to the mixture while constantly whisking to avoid lumps. This will create a smooth caramel coloured batter.
- Take the baking papers previously prepared (colour side facing down) and place 1/3 cup of batter in the centre of the circle. With an angled confectionery knife, spread the batter evenly on the circle. It will be a thin layer about as thick as two to three coins. Try and make the layers as even as you can, place in a preheated oven and bake until it has a dark caramel colour (about 6-7 minutes), honey based cakes turn darker than normal sponge cakes. Be careful not to over-bake as it will leave the layers dry. Don't let them cool on the baking tray as it might still be hot and burn the bottom of the layer.
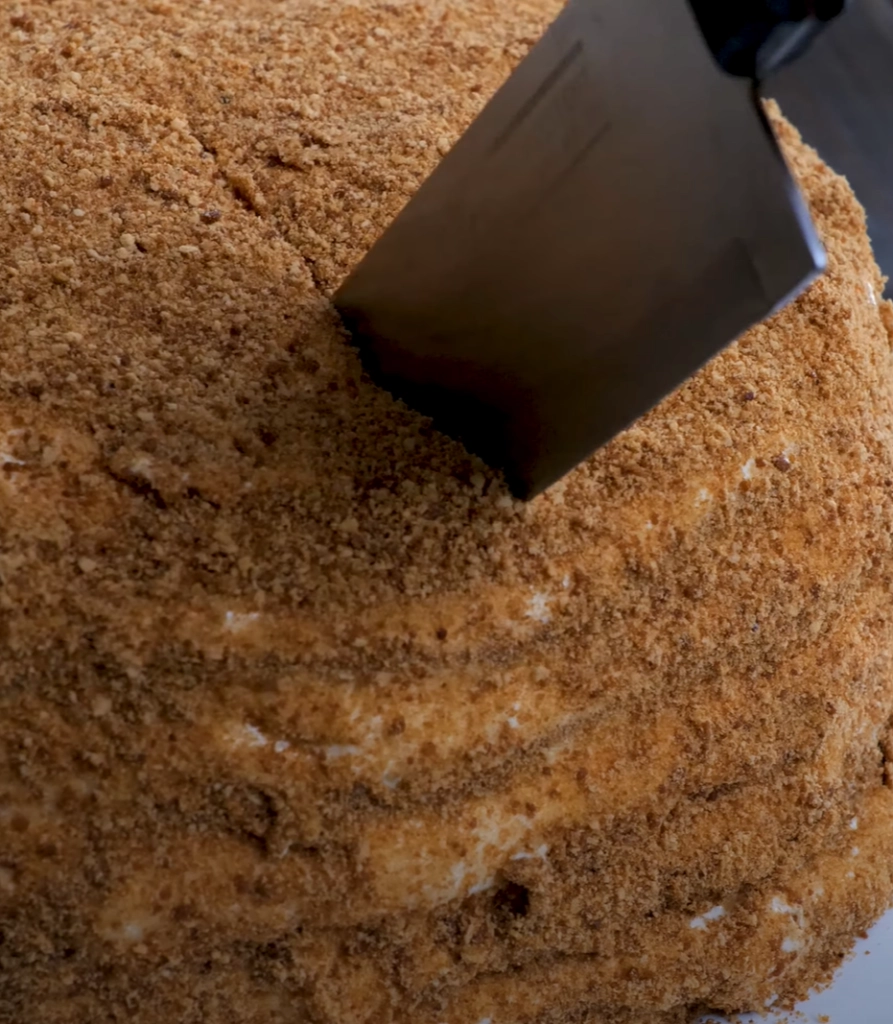
- As you can see in the picture, the cake is covered in crumbles, to make these choose a layer from the previous step (one you are not happy with) and keep baking it at a 150 C for 15 to 20 minutes. The layer will not be hard until its cooled down so aim for a dark caramel colour that almost looks burned and let it cool until hard. Blend until you have fine crumbles and set aside.
- Combine 1/2 a cup of burned honey with the Dulce de Leche, a breeze of salt and whisk until combined. This will create a thick caramel coloured liquid. Set aside
- Place the heavy cream in a mixing bowl and whip to medium stiff peaks, careful this is a LOT of cream so if it doesn't fit in your mixer than split this process in to two steps. Once you have medium peaks, add the mixture from the previous step (remember to use half is you split the process) and whisk until you have stiff peaks. Combine the two half's and set aside for the next step.
- Place two of the used sheets of baking paper on your cake plate so that each covers approximately half the plate. Place one of the baked layers in the centre of the cake plate and add two heaped spoons of the cream filling to the centre of the layer. Using your angled confectionery knife, spread the cream evenly. The baking paper will help you at the end to keep your cake plate clean as we can pull out the baking paper with all the crumbs and cream on it.
- Keep adding layers of cream and cake, don't be shy to move the layers around as the cream is not very thick it will easily slip. Once you have finished all the layers cover the top and sides with an even layer of the remaining cream. Now its time to add the cake crumbs for the finish.
- With a table spoon add the crumbs starting with the top of the cake, the easiest way is by tapping the spoon with your index finger as you hold it between your thumb and palm. If you get too much crumbs in a place, don't worry you can use a kitchen brush to even it out at the end. Once the top is finished start with the sides, you can lightly throw the crumbs against the side, a lot of it will stick in the cream. Just repeat until its completely covered.
- I know at this point, you REALLY want to eat the cake but hold your horses. Over night in the fridge will boost the flavours of everything, the cream will mix with the sponge and everything will become creamy and soft. Also cutting slices will be a lot easier.